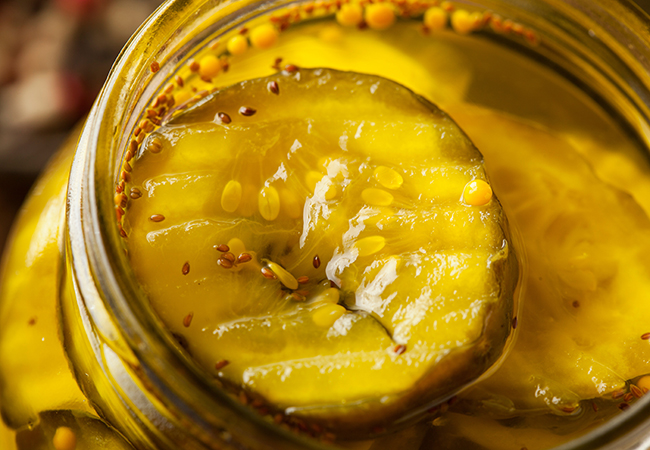
These bread and butter pickles are so good, friends will beg you for a jar! Sweet, tangy, and perfectly crisp, they’re a classic favorite that never lasts long in the pantry. This recipe makes a generous 8 quarts—perfect for sharing with family and friends. For the very best results, choose the freshest cucumbers you can find; we especially love using cucumbers from KT Farms for their unbeatable flavor and crunch. When brining, a large food-safe plastic bin (available at restaurant supply stores) or a commercial-sized stainless steel bowl makes the process easier and efficient—especially if you love tackling big pickling or fermentation projects.
INGREDIENTS:
25 cucumbers, thinly sliced*
6 onions, thinly sliced
2 green bell peppers, diced
3 cloves garlic, chopped
1/3 cup canning or pickling salt (use non-iodized salt only!)
Ice to cover cucumber mixture
3 cups cider vinegar
5 cups white sugar
2 tablespoons mustard seed
1 1/2 teaspoons celery seed
1/2 teaspoon whole cloves
1 tablespoon ground turmeric
*Do not purchase commercially waxed cucumbers for pickling. Be sure to discard the blossom and stem ends of the cucumber.
METHOD:
Wash and sterilize eight 1-quart jars, along with new lids and screw bands. Set aside until ready to use.
In a very large bowl or food-safe tub, combine the sliced cucumbers, onions, green bell peppers, garlic, and salt. Cover the mixture with about 2 inches of crushed or cubed ice. Let stand for 3 hours.
In a large saucepan, combine the cider vinegar, white sugar, mustard seed, celery seed, whole cloves, and turmeric. Bring to a boil, then reduce the heat and keep hot.
Fill a hot water bath canner with enough water to cover the jars by at least 1 inch. Bring to a boil while you finish preparing the pickles.
Drain the cucumber mixture, removing any remaining ice. Rinse thoroughly with cool water and drain again.
Divide the vegetable mixture evenly among the sterilized jars, leaving ½ inch of headspace. Do not pack too tightly.
Ladle the hot vinegar brine into each jar, filling to ½ inch from the top.
Remove air bubbles by sliding a flat plastic spatula (the handle works well) between the food and the side of the jar, moving it gently up and down. Adjust headspace if needed.
Wipe jar rims with a damp paper towel. Place the lids on, gasket side down, and screw on the bands until fingertip-tight.
Place jars in the canner rack and lower gently into the boiling water.
Ensure the water level is at least 1 inch above the jar tops. Add more boiling water if necessary.
Cover the canner and process at a gentle, rolling boil for 15 minutes (adjust time for altitude if needed).
Carefully remove jars and place upright on a towel or cooling rack, leaving about 2 inches between each jar. Let cool undisturbed for 12–24 hours.
Once cool, remove screw bands, check seals (lids should be slightly indented and not flex when pressed), and wipe jars clean.
Label with the name of the product, processing method, and date. Store in a cool, dark, dry place.
YIELD: 8 – 1 quart jars


