I was a latecomer to the galette. Not quite a pie, and not quite a tart, this open-face pastry consists of a pie crust pastry, a layer of fruit, with the edges of the crust folded roughly around the filling. As a classically trained pastry chef, it didn’t appeal to my sensibilities. I’m convinced most pastry chefs (and chocolatiers, for that matter) have a strong OCD streak and can’t tolerate anything less than perfection. After all, ‘perfection’ was indeed the goal while practicing relentless hours to produce perfectly executed piped garlands and swirls with icing on a cake, cutting fruit into precise slices, or cutting a finished pastry into carefully measured, exact-sized pieces. Do you have any idea how much skill (and patience) it requires to create 25 identical pastries? My pastry skills were finely honed with the goal of absolute perfection and consistency — and probably an equal amount of vexation!
The simple, unrefined galette that has been the darling of popular blogs for a few years disturbed my aesthetics. However, when a chef I greatly admire published her version of an apple galette, I decided it was time to see what all the fuss was about and give it a go.
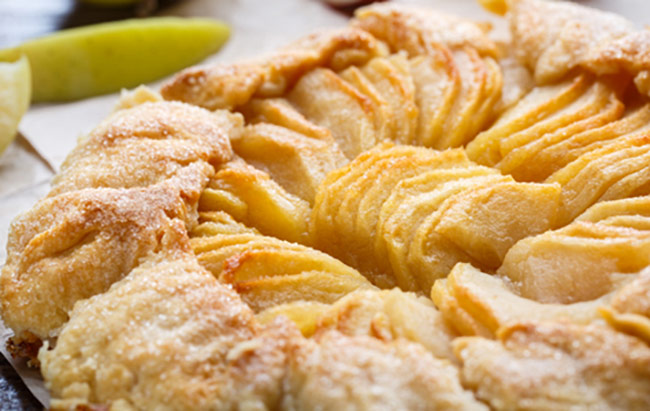
I was intrigued — her galette was neatly folded and finished with an egg wash and sparkling sugar and looked very appetizing. For my first galette, I decided to make a full butter crust for flavor and texture and used a lamination technique for creating those perfect layers of flaky crust. As the dough chilled, I prepared the apples, cutting each apple into 1/8-inch slices with the green and rosy-red peel left on the fruit for added color. I tossed the slices in a mixture of brown and white sugar with a dash of cinnamon and vanilla. As the recipe advised, I sprinkled a healthy tablespoon of flour on the rolled-out dough to absorb and thicken any juices. I arranged the slices in a pleasing concentric swirl of a circle, and then gently folded the edges of the pastry over the perimeter of the fruit filling. I used an egg wash for that lovely golden color and to help the sparkling sugar adhere to the crust, and popped it into the oven. About an hour later, I was looking at a galette in all its just-out-of-oven glory and the aroma was intoxicating! With the pastry barely cooled, we sliced it, added a scoop of vanilla ice cream, and tucked in with relish. We loved it.
The beauty of a rustic galette is its simplicity and lack of perfection. The single layer of fruit caramelizes as it bakes which enhances the natural sweetness of the fruit, so very little sugar is needed. Additionally, any juices released from the fruit also concentrate into a sweet syrup. The buttery, crispy pastry is the perfect vehicle for delivering fruity goodness.
Best of all, a galette makes an almost guilt-free dessert. Unlike a pie made with lots more sugar, a thickener, and much more fruit per slice, a slice of a galette is the perfect portion for dessert — not much thicker than a slice of pizza, but every bit as tasty and satisfying as a whole slice of pie.
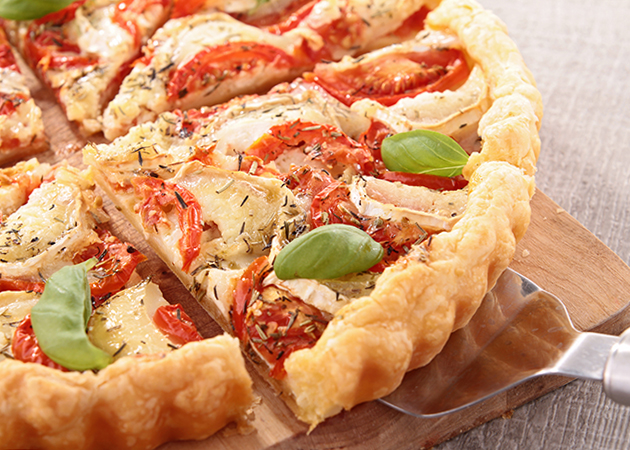
Another huge plus is that no recipe is required! Once you’ve practiced making a few galettes and have the basics down for assembling, the world is your oyster — er — galette. Almost any fruit will work — berries (though a bit juicy…), apples, peaches, pears, plums, and even tomatoes. Mix your fruit, if you like — add some raspberries or blueberries on top of your peach slices. Add a sprinkling of whatever spices you enjoy — nutmeg, cinnamon, or allspice. Naturally sweet fruit like apples, pears, or peaches requires very little sugar, which is a definite plus! Tart fruits, such as blackberries, blueberries, or plums may require a bit more sugar — but feel free to experiment. Other sweeteners that can be used are honey or maple syrup which are particularly good with pears. Brown sugar or a combination of brown sugar and white sugar complements apples and pears. And sweet, dry-farmed tomatoes (yes, they are a fruit!) taste incredible with brown sugar with a dusting of mace or allspice. If you’re so inclined, feel free to drizzle a bit of caramel over a pear or apple galette.
The best tip of all is to remember to use the tablespoon of flour on the bottom of the galette which will help thicken any extra juices. I line my baking sheets with parchment paper and use a spritz of baking spray to add a bit of anti-sticking insurance with sweet fillings. After baking, move to a cooling rack for a few minutes and then gently remove the galette from the parchment paper before any sticky filling has a chance to set up.
And what about savory galettes? They make the perfect appetizer with a glass of wine or a delicious main course with a salad. One of my favorite savory filling variations is a thin layer of caramelized onions, a single layer of pears or apples (extra nice if tossed in a little sugar or maple syrup before arranging on onions), a sprinkle of salt and pepper, some fresh thyme leaves, and top with a few chunky crumbles of gorgonzola or blue cheese of your choice.
Try this delicious pastry and make it a ‘regular’ on your table, too.
APPLE GALETTE
INGREDIENTS:
For the Crust
1-1/2 cups all-purpose flour
1/2 teaspoon salt
2 tablespoons granulated sugar
1-1/2 sticks (12 tablespoons) very cold unsalted butter, cut into 1/2-inch pieces
1/4 cup very cold water
For the Filling
3 large apples, cored (and peeled, if desired), cut into 1/8 inch slices
1/4 – 1/3 cup sugar
1 teaspoon pure vanilla extract
1 teaspoon cinnamon
2 tablespoons unsalted butter, melted
1/8 teaspoon salt
For Assembling and Baking
1 tablespoon all-purpose flour
1 egg, beaten
1 tablespoon turbinado or sparkling sugar
METHOD:
Make the crust:
In a food processor bowl, place the flour, salt, and sugar. Pulse briefly to combine. Add the cold butter to the bowl and process about 5 seconds, or just until the butter is the size of peas. Sprinkle the ice water over the mixture evenly and process just until moistened, about 5 seconds.
Transfer the dough to a lightly floured work surface and collect the dough into a cohesive ball by gently pressing and kneading a few times, just until it comes together. Pat the dough into a rectangle. Lightly dust the surface of the dough with flour, and then fold one-third of the dough into the middle, and repeat with the other side. Press firmly. Gently pat or roll the dough into another rectangle and repeat the folding and pressing firmly. Pat dough into a disk, wrap it in plastic, and place in the refrigerator.
Flour your work surface again and dust the dough with flour, as well. Using a rolling pin, roll into a circle 8 to 10 inches in diameter, turning and adding more flour as necessary so the dough doesn’t stick. Transfer the dough to the parchment-lined baking sheet and refrigerate while you prepare the filling (you’ll roll the dough out further on the parchment paper so go ahead and clean your work surface).
Make the Filling:
Place prepared apples into a large bowl (you should have about 4 cups). Add the sugar, vanilla, cinnamon, melted butter, and salt and toss apples to coat all surfaces with the mixture.
Assemble the Galette:
Preheat oven to 350°. Place a sheet of parchment paper on a baking pan.
Remove the chilled dough from the fridge. Lightly flour a work surface. Using a rolling pin, roll dough into a circle 8 to 10 inches in diameter, turning and adding more flour as necessary so the dough doesn’t stick. Transfer to the circle of dough to the baking pan.
Sprinkle the flour evenly over the pastry. Arrange the apple slices on top in overlapping concentric circles to within 3-inches of the edge, working quickly. Gently fold the edges of the dough over the apples working your way around and creating pleats as you go.
Brush the top of the crust evenly with the beaten egg using a pastry brush. Lightly sprinkle the turbinado or sparkling sugar.
Bake the galette for 55 to 65 minutes, or until the apples are tender and the crust is golden and cooked through. Transfer the pan to a rack to cool.
Using two large spatulas, transfer the tart to a serving plate or cutting board. Slice and serve warm or at room temperature.
SOURCE: Recipe adapted from Jennifer Segal, Once Upon a Chef.


