
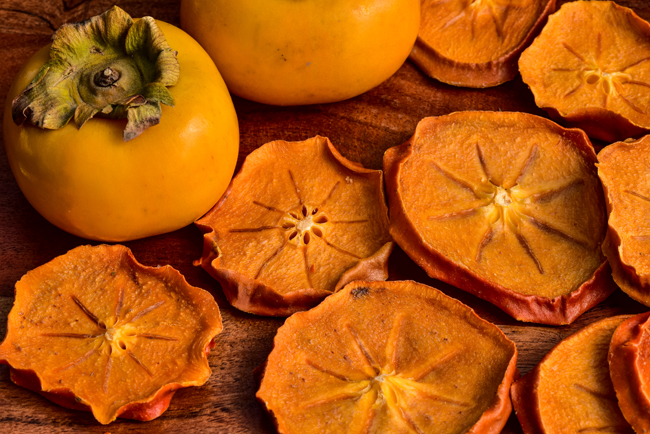
A basket of bright orange persimmons is one of fall’s loveliest kitchen treasures. And while they’re delicious fresh, drying them brings out another side of their personality: concentrated, honey-like sweetness and a pleasantly chewy texture. Sliced crosswise, the fruit sometimes reveals a delicate starburst pattern—making these little rounds as pretty as they are delicious.
You don’t need special equipment to make them. A dehydrator is convenient, but an oven that maintains a low temperature works well, too. Most of the work happens while you go about your day, with an occasional turn of the slices and a check on their progress.
Enjoy dried persimmons straight from the jar, tuck them onto a cheese board, or snip them into oatmeal, cookies, and quick breads. They’re a wonderful way to stretch a short, sweet season.
Start with the Right Persimmons
For this recipe, choose ripe but firm Fuyu persimmons, the squat variety shaped a little like a tomato. Look for richly orange fruit that feels firm enough to slice cleanly.
Even slices are the secret to even drying. A mandoline or Japanese-style slicer makes quick work of the job; use the hand guard to protect your fingers. A sharp knife and a little patience work nicely, too.
Dried Persimmon Slices
INGREDIENTS
12 ripe, firm Fuyu persimmons
METHOD
1. Prepare the fruit.
Wash and dry the persimmons. Remove the leafy caps and peel, if desired. Cut crosswise into even slices about ⅛ inch thick. Remove any seeds.
2. Prepare the oven.
Set the oven to 140–150°F, using convection if available. An oven thermometer is helpful for checking the actual temperature. If your oven cannot maintain a temperature this low, a dehydrator gives more dependable results.
3. Arrange the slices.
Line baking sheets with parchment paper, or use oven-safe drying racks over baking sheets for better airflow. Arrange the slices in a single layer without overlapping. Work in batches if necessary rather than crowding the trays.
4. Dry slowly.
Place the trays in the oven. Rotate their positions periodically and turn the slices every few hours, especially if using parchment-lined sheets.
Begin checking after about 6 hours, but allow considerably longer if needed. Drying time varies with slice thickness, the fruit’s moisture content, and the oven’s airflow. Let texture guide you rather than the clock.
5. Check for doneness.
Remove a few slices and let them cool before testing. They should feel leathery and pliable, with no moist center or noticeable stickiness. Cut or tear a slice to check inside. Remove finished pieces as they become ready and continue drying the rest.
6. Cool completely.
Transfer the dried slices to racks and let them cool completely before placing them in containers.
Using a Dehydrator
Arrange the prepared slices on dehydrator trays without overlapping. Dry at 140°F, following your appliance’s instructions. Start checking early if the slices are very thin; some batches may take 12–15 hours or longer. Test cooled pieces for the same leathery, evenly dried texture.
Before Storing: One Helpful Extra Step
Conditioning helps distribute any remaining moisture evenly among the slices. Loosely pack the cooled fruit into clean, dry glass jars, seal, and let stand for 7–10 days. Shake the jars daily to separate the pieces and check for condensation.
If moisture appears inside a jar, return the fruit to the oven or dehydrator for further drying, then cool and repeat the conditioning process. Discard any fruit that develops mold.
Once conditioned, pack into airtight containers and store in a cool, dark, dry place. Refrigerate or freeze for longer storage.
Delicious Ways to Enjoy Them
Build a fall cheese board: Pair with aged cheddar, goat cheese, toasted walnuts, and crisp crackers.
Brighten breakfast: Snip into oatmeal, granola, or yogurt.
Add sweetness to salads: Toss with peppery greens, roasted beets, pecans, and a tangy vinaigrette.
Bake something lovely: Chop and fold into oatmeal cookies, muffins, or nut bread. Briefly soak firmer pieces in warm water before adding to batter.
Dip in dark chocolate: Dip half of each slice, then let set on parchment for a simple seasonal treat.
Give a little autumn away: Pack into a small jar with a handwritten label for a thoughtful homemade gift.